

Laying timber flooring brings timeless elegance and warmth to any space. But what happens when your foundation is a concrete slab? The good news is: timber flooring on concrete is absolutely possible — with the right preparation and materials. Whether you’re a homeowner, renovator, or DIY enthusiast, this comprehensive guide will walk you through every step of the process.
Why Choose Timber Flooring on a Concrete Slab?
More homes and buildings across Australia are constructed with concrete slabs as the foundation. Concrete is durable and cost-effective, but it can feel cold and sterile. That’s why laying timber flooring on concrete slabs has become a popular solution — blending practicality with natural beauty.
Benefits Include:
A warm, stylish finish with natural timber tones
Increased property value
Compatibility with underfloor heating systems
Long-lasting durability when properly installed
Methods of Laying Timber Flooring on Concrete
There are two main methods used to install timber flooring on a concrete slab:
1. Floating Floor Installation
This involves laying engineered timber or laminate flooring on top of an underlay without permanently fixing it to the concrete. It’s a popular DIY method.
2. Direct Stick Timber Flooring (Glue-Down)
This is a more professional method where timber boards are glued directly to the slab using a strong adhesive. It offers better acoustics, a firmer feel, and is ideal for solid or engineered timber.
In this guide, we focus on the direct stick timber flooring method — the most effective and long-lasting approach for laying timber on concrete.
Tools and Materials You’ll Need
Before you start, gather the following tools and materials:
Moisture barrier or epoxy sealer
Timber flooring (engineered or solid)
High-quality timber adhesive (e.g., polyurethane-based)
Trowel (for adhesive spreading)
Rubber mallet
Spirit level or laser level
Tape measure and chalk line
Moisture meter
Floor roller (optional, for better adhesive bonding)
Safety gear (gloves, knee pads, mask)
Step-by-Step: Laying Timber Flooring on a Concrete Slab
Step 1: Assess and Prepare the Concrete Slab
Before anything else, make sure your concrete surface is suitable for installation.
Check for Levelness
Use a long spirit level or laser level to check if the slab is flat. Industry standards typically allow a variation of no more than 3mm over 3 meters.
If there are dips or high spots:
Fill low areas with self-levelling compound
Grind down high points with a concrete grinder
Clean the Surface
Sweep and vacuum the concrete slab to remove all dust, debris, and loose particles. A clean surface ensures better adhesion.
Moisture Testing
Using a digital moisture meter, test for moisture content. Laying timber flooring requires the slab to be dry — typically under 4.5% moisture content, depending on the adhesive manufacturer’s guidelines.
If the slab is too damp, delay installation or use an epoxy moisture barrier.
Step 2: Apply Moisture Barrier
Even if the concrete appears dry, moisture can rise from underneath over time. Applying a moisture barrier or epoxy sealer is essential before laying timber on concrete.
Apply with a roller or brush in even coats
Allow it to cure for 24 hours (or as directed)
Make sure the barrier is fully dry before proceeding
Step 3: Plan Your Layout
Start by measuring the room and planning the layout of your boards. It’s best to laying timber flooring perpendicular to the longest wall or toward a light source, such as a large window.
Use a chalk line to mark a starting line, leaving an expansion gap of 10–12mm from the wall to allow the wood to expand with humidity changes.
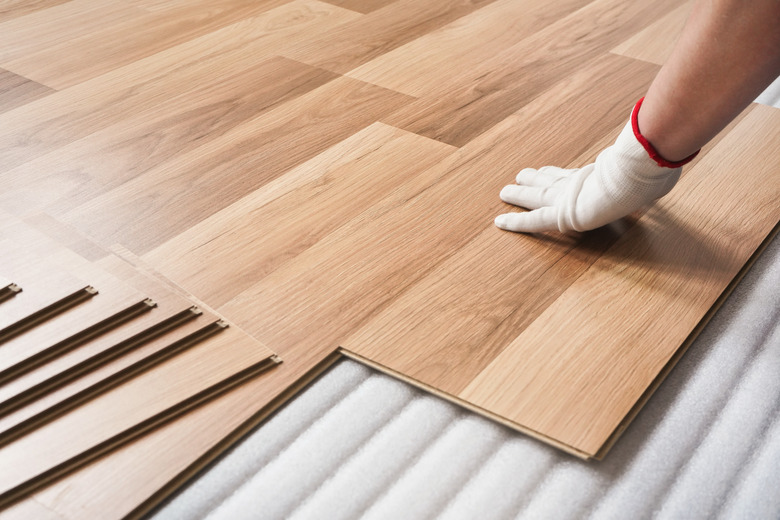
Step 4: Begin Laying Timber Flooring
Now comes the exciting part: laying timber flooring on your concrete slab.
Spread the Adhesive
Using a notched trowel, spread adhesive over a small section of the slab — typically one square meter at a time. Only apply as much as you can cover within 20 minutes.
Lay the First Row
Carefully place your first board along the chalk line. Use spacers to maintain the expansion gap at the wall.
Press down firmly and tap into place using a rubber mallet if needed.
Continue Row by Row
Stagger the joints for a natural look (avoid H-patterns). Apply adhesive and continue placing boards row by row, using spacers and tapping blocks to ensure tight joints.
Step 5: Finishing Touches
Once the boards are laid:
Roll the Floor (Optional)
Use a 50–70kg floor roller to press boards into the adhesive. This helps ensure full contact between the timber and the slab, particularly in high-traffic areas.
Let the Adhesive Cure
Most adhesives require 24–48 hours to cure fully. Avoid walking on the floor during this time.
Remove Spacers and Install Trims
After curing, remove all wall spacers and install skirting boards or scotia to cover the expansion gaps.
Tips for Success When Laying Timber on Concrete
Acclimatise Your Timber: Let your timber flooring sit in the room (in unopened boxes) for 48–72 hours before installation. This allows it to adjust to the local temperature and humidity.
Check Adhesive Compatibility: Not all adhesives work with all timber types. Check the manufacturer’s specs or consult a professional.
Hire Professionals if Needed: For premium hardwood floors or large areas, hiring a professional ensures the best results and warranty protection.
Common Mistakes to Avoid
- Skipping the moisture barrier
- Laying on an uneven slab
- Ignoring expansion gaps
- Using the wrong adhesive
- Rushing the curing process
Each of these can lead to buckling, creaking, gaps, or even floor failure down the line.
Timber Flooring Maintenance After Installation

Once your floor is installed, follow these maintenance tips to keep it looking its best:
Use felt pads under furniture
Avoid excessive moisture – clean with a damp (not wet) mop
Maintain indoor humidity between 40–60%
Sweep regularly to prevent dust and grit damage
Is Laying Timber Flooring on a Concrete Slab Worth It?
Absolutely. With the right tools, preparation, and method, laying timber on concrete can transform a cold, grey foundation into a warm, welcoming space.
Whether you’re installing a floating system or opting for the professional direct stick timber flooring method, you’ll enjoy long-lasting beauty and comfort.
Let CB Timber Floors Help
Need expert help for your timber flooring concrete slab project? At CB Timber Floors, we specialise in direct stick timber flooring, floating floors, and hybrid installations — all tailored to your home or office.
We offer:
Free consultation and onsite assessment
A wide range of engineered and solid timber options
Skilled installers with years of experience in Melbourne’s climate
Contact us today for a quote and make your dream timber floor a reality.


